Here's a simple tutorial on how to make round chains with Photoshop (Yume uses cs3)
It's super easy and handy, believe her! and the results are quite nice :D
So here we go...
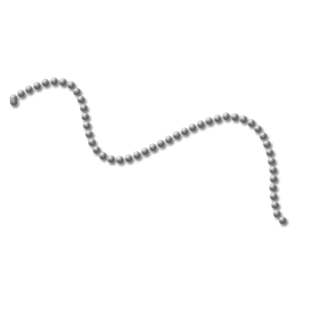
The end result would be something like...
^This.
If you're interested in how to make this please read on XD
First of all...
Things that you'll need:
1. a HARD, round brush.
2. This tutorial. xD see? this is easy!
Kay, so.. steps.
1. Create a new photoshop document, name it.. blah blah blah. and create a new layer.
2. Select your 'brush' tool. Choose a HARD, ROUND brush. If you wonder what it looks like, it will just look like a big dot in your photoshop dropdown. make SURE that the hardness is set to 100%!!!
3. Open the brush presets. From there, we will be changing several presets :
a. Click on 'Brush Tip Shape'
you'll see a menu somehow similiar to this. Here you can choose the diameter you want of your chain (Yume chose 14px since she wants it kinda thin and small) you may choose a size you think is fit. it could be smaller, it could be larger.
(*Notice the hardness is set to 100% !)
Tick the 'spacing' option, and set it to around 100~120% make sure the dots that come out will be separated, or else it will look as if the beads are sticking together >.<
(see image below for the screenshot)
b. Check the 'shape dynamics' box.
Set the Size Jitter to 0%
Minimum Diameter to 100%
Turn both the Angle and Roundness Jitter off
(see screenshot below)
c. and lastly, check the 'smoothing' option.
Your brush presets are now done.
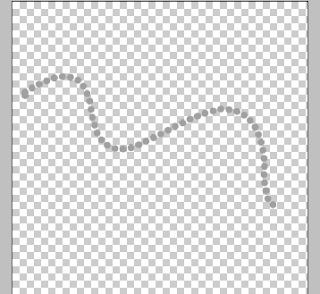
4. Now draw the shape you want your chain to look like. Simply click and drag your mouse in the line or curve you want your chain to be. here's what Yume drew :
(*btw you can also change the color of your brush, it doesn't have to be grey OxO )
5. Right click on your brush layer and select 'Blending Options'. We will now make it from 2D to 3D :D
a. set the blend mode to 'normal', opacity to '100%' you can change the opacity if you want the chain to be semi transparent.. but Yume doubts that semi transparent chains exist oAo;;
b. Check the 'Drop Shadow' option.
Set the Blend mode to 'multiply', and opacity to roughly 50%. you may alter it depending on your preferences.
set the distance to 5px, spread to 0px, and size to 5px. Again, you may change this according to your picture. (see below)
c. Check the 'inner shadow' option.
Set the blend mode to 'multiply', opacity to '10%', distance to 3px, choke to 7px, and size to 5px (see below)
c. Check the 'Brevel and Emboss' option.
set the style to 'inner brevel', technique to 'smooth', depth to 200~250px (depending on the size u choose)
Direction is 'up', size is 6px, and soften it a bit till it looks round. :)
For the Shading part, the highlight is white, screened at a high opacity, and shadow to multiply at a lower opacity. this will make it more 3D. (see below)
d. Check the 'contour' option, and set it as below.
Click 'OK', and tada! here's how it -should- look like. xD
Thanks for reading this tutorial! Yume hopes you liked it and find it useful :)
Again, this is not the only way to devise chains like this, this is only a way Yume found and she wishes to share to everyone of you amazing artists out there :DD
If you have any questions, comments, or suggestions to improve, please don't hesitate to contact her! She would be glad to answer to your questions!
You may contact her here : www.facebook.com/lost.wonderland
or message her on facebook :) //If you like Yume's works please feel free to 'like' her page to subscribe to more tutorials, artworks, and resources! :)
Again, thanks for reading, and happy creating! X3
//Yume.2012


